Welcome, Guest. Please login or register.
Did you miss your activation email?
Show Posts
This section allows you to view all posts made by this member. Note that you can only see posts made in areas you currently have access to.
Pages: [1] 2
1
General Outdoor Furnace Discussion / Re: Transfer Switch or Interlock Kit
« on: February 10, 2014, 07:13:35 PM »
here in Ontario you must have a generator supply panel whether it is manual or automatic. I
have a 60 amp panel off of my main panel with all the stuff in it I want to run from my generator including
my shop. It is a manual throw which will not allow both sides to b on at once. one thing the hydro company wants
is what a generator panel provides that both the hot feeds and the neutral become isolated by this type of panel switch.
if you simply backfeed with your main breaker off your neutral is still connected to the grid and power can
sometimes backfeed through the neutral and you could end up severely injuring someone if not killing them!
Hydro is not something to fool with it can be very dangerous and I don't think anyone wants to be responsible for another person life or death for that matter. A few dollars out of your pocket isn't worth killing someone over in my mind! Put in a generator panel with the proper switching device.
2
Heatmor / Re: new heatmor and having huge issues
« on: February 09, 2014, 08:10:46 PM »Really mix of big and small wood would make the temp low?? I do that. Bridging wood is that crossing the wood cause I make sure it flat and stacked flatIf you clean out the ash and the stove begins to function properly this may be your clue!
I find when I'm not getting enough heat the stoves ashes need to be cleaned... I did that today and the temp got to 171 house is toasty. I thought this stove would be fill it and forget it

I don't own a heatmor so not exactly sure of the design but I have a homemade gasser and from time to time I notice it has a hard time with recovery and as of late with a bit of snow on the wood now and then my ash will get hard around the slot and also in the secondary. This was discussed on a p & m post also a liitle while ago about a hard ring of ash around the slot.
Are you stirring around the coals in your firebox every time you load especially around the slot?
Is the slot getting plugged with hard ash thus not letting the stove breath? with nowhere for the intake to exhaust it will not burn. Seems your issues lie somewhere in this area if you clean out the ash and it performs properly.
The overheating must be a control issue or it wouldn't be able to happen.
3
General Outdoor Furnace Discussion / Re: R-19 under staple up
« on: February 08, 2014, 06:32:01 PM »
I put dubble bubble under the plates (foil up ) then pushed insulation tight up to that then plastic netting to hold it in .
seems to work very well thru 5/8 ply with hardwood floor on top. Actually thought all the wood might insulate from the heat coming thru but still ok.
seems to work very well thru 5/8 ply with hardwood floor on top. Actually thought all the wood might insulate from the heat coming thru but still ok.
4
Home Made / Re: Biggest concerns for Gasification boiler build
« on: January 28, 2014, 04:29:40 PM »
yes there is a steel bottom in the primary burn with the slot cut in in a little larger than what I made with the
brick and the high heat mortar. 2 layers of 2" thick brick on top of the steel on primary side and one layer 2"
brick on the under side of the steel forming the firebrick top of the secondary. So far no deterioration in any of the brick that
I have noticed.
brick and the high heat mortar. 2 layers of 2" thick brick on top of the steel on primary side and one layer 2"
brick on the under side of the steel forming the firebrick top of the secondary. So far no deterioration in any of the brick that
I have noticed.
5
General Outdoor Furnace Discussion / Re: Optimizer 250
« on: January 27, 2014, 08:46:40 PM »
lone ranger if you go to your local hardware store buy a wire wheel brush for a drill and a
fibreglass chimney brush rod(one of the 5' sections that you can thread together)
cut one end of the rod off with the threaded fitting, drill out the fibreglass, fit the end of the drill brush
into the hole and give it a little tack with a welder. Thread that back onto the other end of the rod.
You now have a brush you can put in your drill that will flex enough to feed down into the vertical tubes!
When the brush wears out just grind the tack weld and put in a new one. That is how I keep mine clean
but I do not get near that much creosote buildup just dust.
6
Home Made / Re: Wood Gasification Boiler Build
« on: January 27, 2014, 08:10:33 PM »
Nice build!! Looks awesome and looks like you have the equipment to do it too!
Brings back memories of my build but mine didn't turn out that nice.
Brings back memories of my build but mine didn't turn out that nice.
7
Home Made / Re: Biggest concerns for Gasification boiler build
« on: January 27, 2014, 08:01:46 PM »
yes the squares tubes are the primary and secondary air feeds. The primary feeds up over the top of the fire and the secondary branches out to both sides, down the walls to feed in under the firebrick where at that point I cut a hollow in the brick with four veins to feed out at the slot. The slot is in the middle of the firebox which seems to work very well for even burns in the firebox.
The secondary is mainly open except that I had to put a wall down the center with bricks to support the ceiling layer. this also seems to work well to spread the heat and the ash tends to move to the front and build there before filling the back end. All in all the performance of it seems to be virtually troublefree but I don't have experience with any others either.
The secondary is mainly open except that I had to put a wall down the center with bricks to support the ceiling layer. this also seems to work well to spread the heat and the ash tends to move to the front and build there before filling the back end. All in all the performance of it seems to be virtually troublefree but I don't have experience with any others either.
8
Home Made / Re: Biggest concerns for Gasification boiler build
« on: January 26, 2014, 10:12:42 PM »
9
Home Made / Re: Biggest concerns for Gasification boiler build
« on: January 26, 2014, 10:09:52 PM »


10
Home Made / Re: Biggest concerns for Gasification boiler build
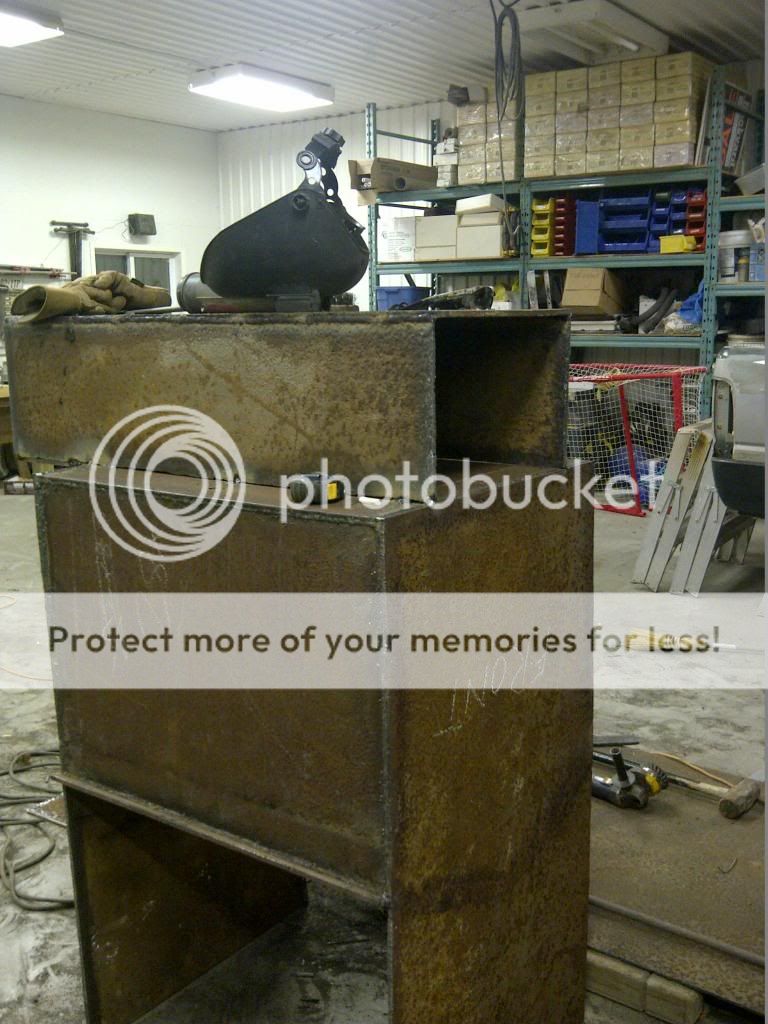
« on: January 26, 2014, 09:50:00 PM »
Some pics of my build:

11
Home Made / Re: Biggest concerns for Gasification boiler build
« on: January 24, 2014, 11:27:25 PM »
lookin good so far binford. thinking you may want to raise or spread that heat exchange a bit so u can
access those vertical tubes a little easier for brushing them out.
Any ideas on your airbox and air feeds for the primary and secondary?
access those vertical tubes a little easier for brushing them out.
Any ideas on your airbox and air feeds for the primary and secondary?
12
Home Made / Re: Draw the water off the top or bottom?
« on: January 24, 2014, 11:20:18 PM »
if you extend your return 2/3 to 3/4 of the way into the tank it will force the water into the front and around to circulate. This is the way my unit is but with my temp gauges I show 190 on the supply pulling from 10" off the bottom with my aquastat set at 195 positioned 3/4 of the way up the tank so there is a bit of difference throughout the tank but not huge.
13
Home Made / Re: Biggest concerns for Gasification boiler build
« on: January 24, 2014, 06:01:29 PM »
Think there may be something to not making the secondary chamber too big as well. think you want to keep that brick fairly close to that flame so it retains high temps that r produced there to keep the gasification happening quickly on the call for heat. to large of an area may cause reduced temps and sluggish start up of gasification. Not sure just a theory on my part. You may want to research what others are using for sizing on their secondarys.
14
Home Made / Re: Biggest concerns for Gasification boiler build
« on: January 24, 2014, 05:54:28 PM »
yes all tubes are 2"
I would definitely do all the runs in fact maybe even a few more. I think the goal is to have the surface area to dissipate the heat in to the water. Given my stack temps are 240 I think it is pretty close but once they r a bit dirty it could be an advantage to have a few more runs to keep the efficiency up.
I purchased my bricks and high heat mortar from patene building supplies her in Ontario. Not sure on the grade of the firebrick but so far no sign of any deterioration. I believe they were 2" x 4" x 9" and around $3 a piece but in would have to check on that to be sure.
15
Home Made / Re: Biggest concerns for Gasification boiler build
« on: January 23, 2014, 07:44:44 PM »Can anyone elaborate on the importance of proper heat exchanger size?Not sure what the engineering is on that exactly but I know you don t want to restrict your air flow back too much.
As the air moves through the chambers and around corners it naturally loses velocity so you would want enough tubes to allow the heat to travel thru easily enough but many tubes of smaller sizes increase surface area contact to the water jacket thus allowing maximum heat extraction. Mine has six 2" tubes off of the secondary chamber about 30" long and ten 2" tubes travelling horizontally 36" back to front and then 10 more front to back then exits out 6" stack. That gives a total of 75' of tube immersed in the water jacket to extract the heat from.
I run the boiler at 195 with 8* dif and when it is clean my stack temp 1" above where it exits the water jacket will be 240* so I think it is pretty much extracting every btu it can. On cold days I have icicles hanging off my chimney cap!!
Pages: [1] 2