Welcome, Guest. Please login or register.
Did you miss your activation email?
Show Posts
This section allows you to view all posts made by this member. Note that you can only see posts made in areas you currently have access to.
1
Home Made / Re: new here, and about to start building a new furnace. got some questions.
« on: December 13, 2014, 08:46:38 AM »
My house is fairly poorly insulated, 1750 sq/ft, and,, in a wind tunnel. I keep it 70-72, and I also currently heat 2 rooms in my shop, about 16x16 each, to 65-72 constantly (these are also rather poorly insulated). Plus I run my hot water from my boiler.
I couldn't really tell a difference in wood consumption when I added the shop heat+water heater. It hasn't dipped down into "cold" weather since I finished the shop heat, time will tell I guess.
Heres a link to my boiler build.
http://www.outdoorboilerforums.com/viewtopic.php?f=2&t=53
As a quick overview, 8" stack which is plenty, Tall firebox (actually dont recall dimensions, would have to look- as a guess 48"x26x32)
Plan, design, and plan. Getting it right before you start welding will save you alot of time.
2
Home Made / Re: Starting Gasification build
« on: July 18, 2014, 09:04:38 PM »
Not much action here. Not going to continue to post the same thing on two sites, the rest of my build will continue at http://www.outdoorboilerforums.com/viewtopic.php?f=2&t=53
for anyone who might be interested.
for anyone who might be interested.
3
Home Made / Re: Swimming pool heater design
« on: July 13, 2014, 10:14:06 PM »
I'm definitely no expert, but your going to have smoke. Your not re-burning the exhaust gases, only routing them through heat xchange to utilize more heat.
4
Home Made / Re: Swimming pool heater design
« on: July 11, 2014, 02:54:29 PM »
Wow. Lot of cash in stainless there..
5
Home Made / Re: Starting Gasification build
« on: July 03, 2014, 10:14:31 PM »
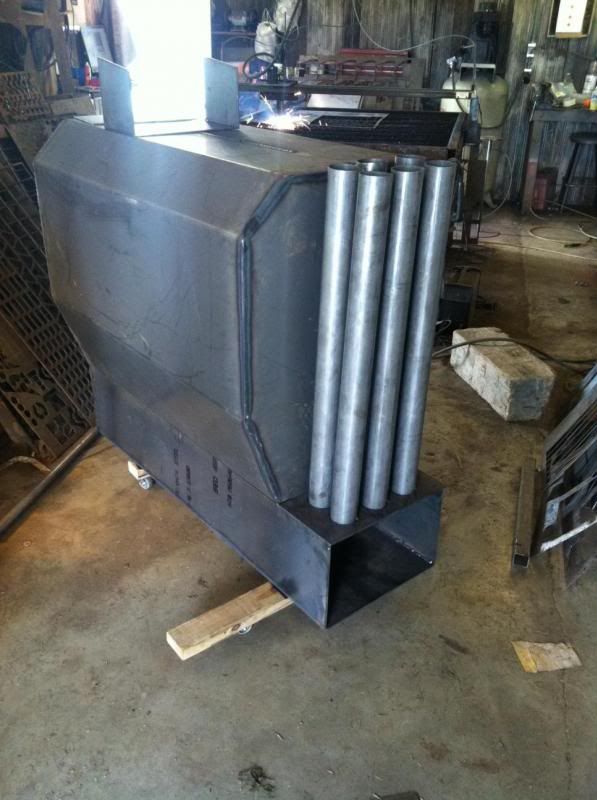
Picked up the remaining 2" tube and got most of them welded in today.
Fiddled around with the access box divider, think I may add a small bypass in it, as a means of adjusting my stack temps. Probably not really needed, but it won't hurt anything if it never gets used. The blue parts are ledges or track, that the divider can slide in. That way it can be removed, allowing better access to the first pass tubes.
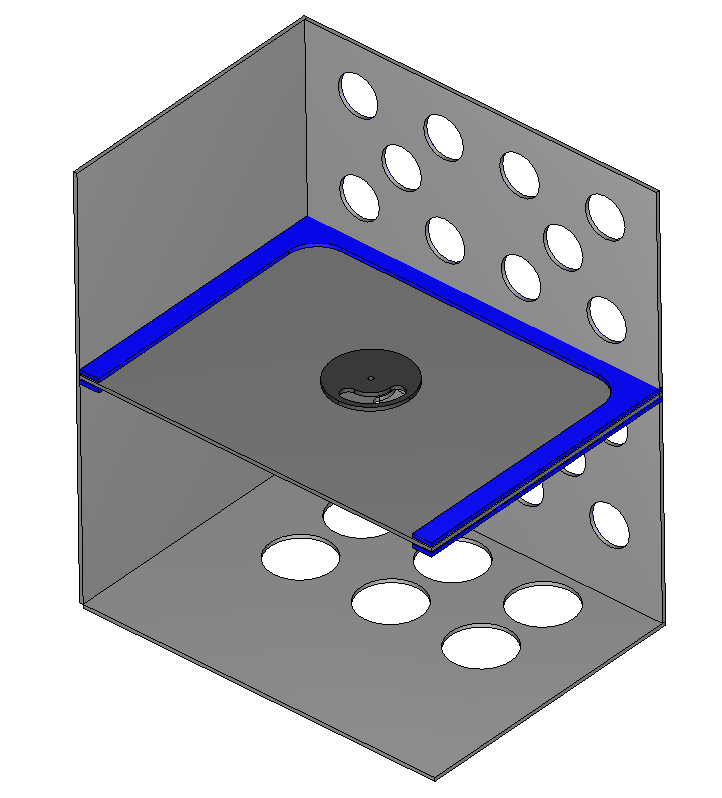
Fiddled around with the access box divider, think I may add a small bypass in it, as a means of adjusting my stack temps. Probably not really needed, but it won't hurt anything if it never gets used. The blue parts are ledges or track, that the divider can slide in. That way it can be removed, allowing better access to the first pass tubes.

6
Home Made / Re: Starting Gasification build
« on: July 02, 2014, 09:25:41 PM »
Added a running tally of my expenses+parts to the first post, I've noticed others have asked for this in the past but did not see anyone do it yet. Perhaps it will be helpful.
7
Home Made / Re: Starting Gasification build
« on: July 02, 2014, 08:39:34 PM »
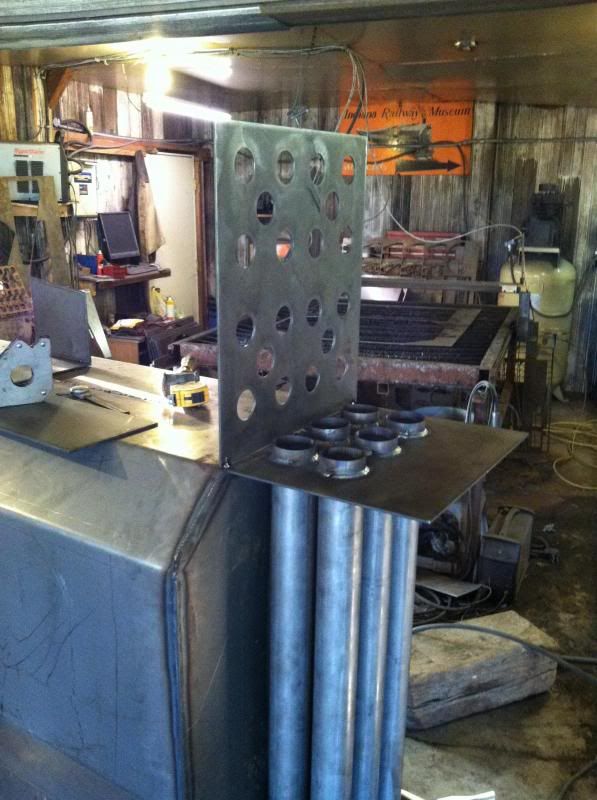
Cut the front access box tube plate, so I could start getting the tubes cut up and off my floor. Looks like I'll need another 8 feet or so of 2" tubing, the lengths were random instead of 20's, so there was more waste than I figured.
Probably it for tonight, I have other actual work I need to get done for tommorrow. Taking the family to an amusement park friday, so no work that day!

Probably it for tonight, I have other actual work I need to get done for tommorrow. Taking the family to an amusement park friday, so no work that day!


8
Home Made / Re: Starting Gasification build
« on: July 02, 2014, 08:29:18 PM »This really looks like a nice unit in the making. Great welding and design attention.

Thanks, I hope so!
Im not so sure about the great design attention, I definitely could have done better- always lacked in the design department. I have become better in the past few years, mainly due to increased CAD skills.
9
Home Made / Re: Starting Gasification build
« on: July 02, 2014, 06:33:53 PM »
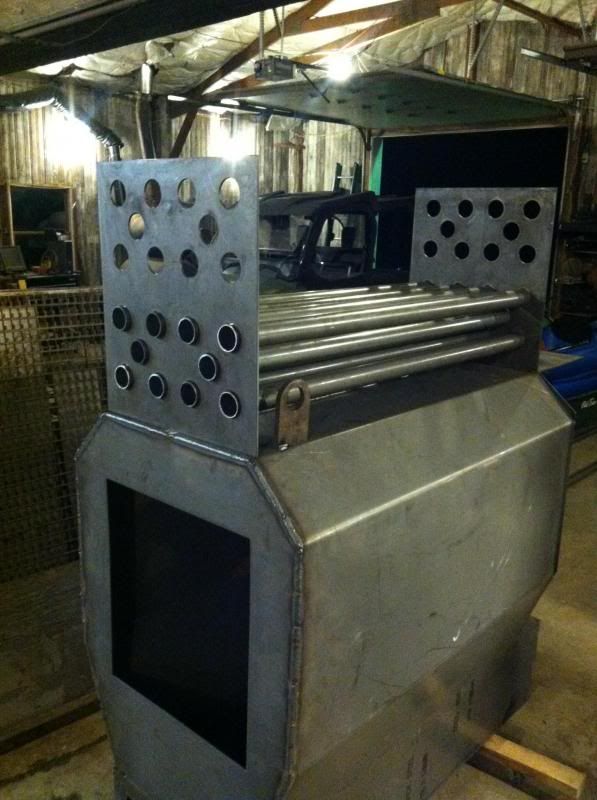
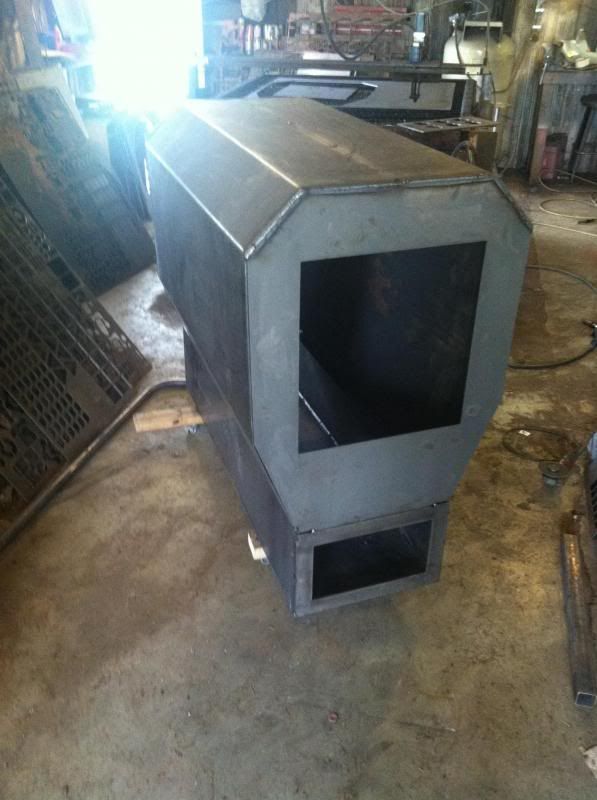
Finished welding the first pass tubes in, and cut the back of the access box for the 2nd/3rd pass tubes. Probably cut the front access box next so I can get the tubes cut and installed.


10
Home Made / Re: Starting Gasification build
« on: July 02, 2014, 02:36:57 PM »
Cut the bottom of the 2nd/3rd pass access box, and started welding the first pass tubes in.
I understand its not easy, I spent a number of years at a previous job where we repaired alot of large hydraulic pipes, as the large die casting presses shook/shimmied and were jolted with very high pressures. Currently, the business I work for has a large number of sintering furnaces, with water jacket sections we replace here and there. Also welded various fluid and air tanks over the years in my home shop and at work.

I understand its not easy, I spent a number of years at a previous job where we repaired alot of large hydraulic pipes, as the large die casting presses shook/shimmied and were jolted with very high pressures. Currently, the business I work for has a large number of sintering furnaces, with water jacket sections we replace here and there. Also welded various fluid and air tanks over the years in my home shop and at work.
11
Home Made / Re: Starting Gasification build
« on: July 01, 2014, 11:56:06 AM »
I'll weld the tubes to the plate from the bottom side, then weld the plate to the secondary. The plates just sitting on the secondary for the photo.
As for leak testing, not sure yet. It might require making some panels/gaskets to cover the door openings temporarily. I don't expect much trouble, the steel is all new/clean and welds nice. If theres a leak it will be a spot I forgot to weld, so I'll need to just pay extra attention.
If I can think up a way to use flanges to mount the doors, then I could easily bolt block off plates/gaskets on the openings to test. Thats probably my best bet.
12
Home Made / Re: Starting Gasification build
« on: June 30, 2014, 09:06:28 AM »
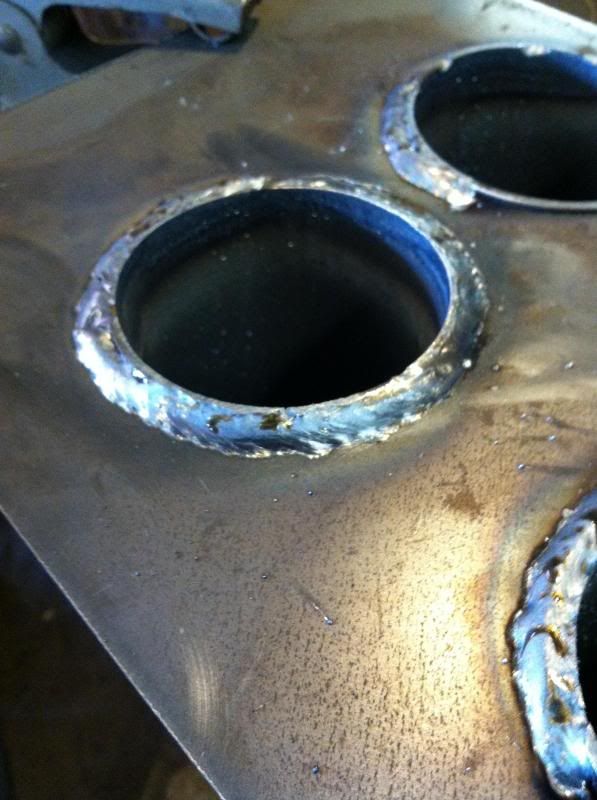
Well my tubing was in this morning, so I cut the 3" into lengths and tacked onto the mount plate. Tubing is about 14ga, and looks about spot on as to what I wanted. Thick enough, but not too thick. Should be plenty of heat transfer- especially if I slip turbulator strips in later. The 2" I got for the 2nd/3rd passes is 14ga as well.
I've got the rest of the week off from work, so hopefully I can get most of the firebox/heat exchangers finished atleast.
I've got the rest of the week off from work, so hopefully I can get most of the firebox/heat exchangers finished atleast.

13
Home Made / Re: Wood Gasification Boiler Build
« on: June 29, 2014, 07:44:44 PM »
I see you have 3 air channels into firebox, whats the purpose of the top inlet? Most I've seen use air midway or even lower, and air at the nozzle. I guess its better to have it and not need it than need it and not have it?
14
Home Made / Re: Starting Gasification build
« on: June 29, 2014, 06:25:53 PM »
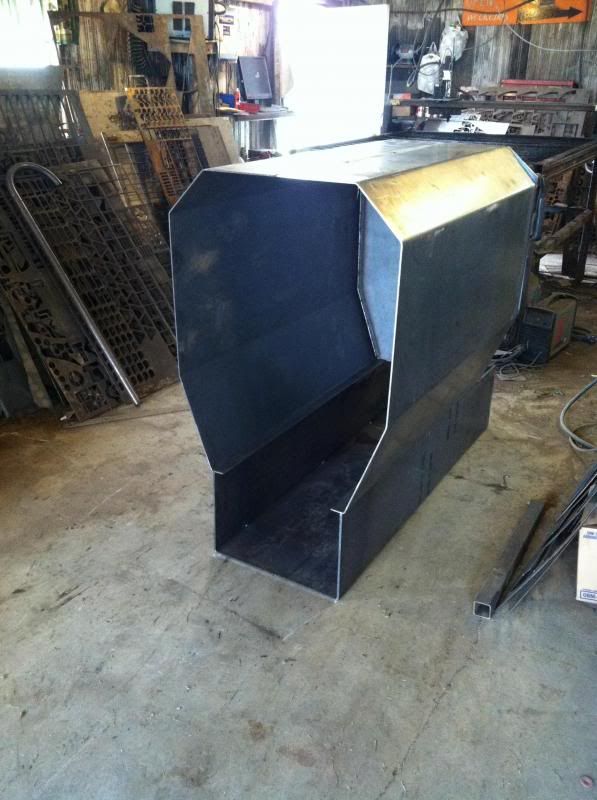
Finished welding the secondary seams, and cut and added the front panel this morning.

15
Home Made / Re: Starting Gasification build
« on: June 24, 2014, 07:36:03 AM »
Had a bit of time this morning after work to make progress, pretty excited to make this thing look like a boiler.
My firebox is 48" long, so per my drawing I needed 60" for the secondary- to allow room for the heat exchanger tubes. I settled for a 57" long secondary, as it was what I could fit on the table. I had some 5x5' .25" handy, so I plasmacut my secondary from that. I had briefly considered having the local shop bend the secondary, but I already had the steel, and my labor is cheap! I cut the panel with .375" tabs about every 2 feet on the bend lines, that way all I have to do is fold it like paper (heavy paper!), square it and weld.
Looks like I can pick up some tubing soon for the heat exchangers.

