Welcome, Guest. Please login or register.
Did you miss your activation email?
Show Posts
This section allows you to view all posts made by this member. Note that you can only see posts made in areas you currently have access to.
Pages: [1]
1
Advanced Plumbing / New plumbing
« on: September 04, 2017, 09:17:15 PM »
So I removed my old memco oil boiler and all of the plumbing associated with it so all that I have left is the heat exchanger and the copper runs to the baseboard zones. I'm going to be setting the system up with a primary/secondary design with the outdoor boiler HX integrated into the primary loop. I have 3 heating zones currently and a 4th one planned in the future when I finish my basment.
I'll be using a plate HX for DHW fed off the primary loop with a monoflow tee. My largest zone only has 30' of baseboard. The 2nd zone is about half that and the 3rd zone is one 7' baseboard. All zones are 3/4" copper. The house was setup with zone circulators, but I was debating plumbing it with a variable speed ECM pump and zone valves. I have a bunch of Taco 007 pumps and a controller for up to 6 zones, so I may just end up going that route, but with the low flow requirements I don't want to over pump the zones and end up wasting energy by not having the flow slow enough for efficient heat transfer at the baseboards.
I have a 120k btu oil boiler that will also be plumbed into the primary loop via close tee's, but will only be for a backup system if for some reason I can't run the outdoor boiler. I'll probably set that up to have a constant 120* flow of water through it to avoid cold starting. I won't have that installed right away, just going to be running the G200 and getting the oil setup at some point in the future. I'll try and get a diagram of what I'm planning drawn up in the next few days and posted.
2
General Discussion / Deal on a backup oil boiler
« on: June 06, 2017, 11:43:18 AM »
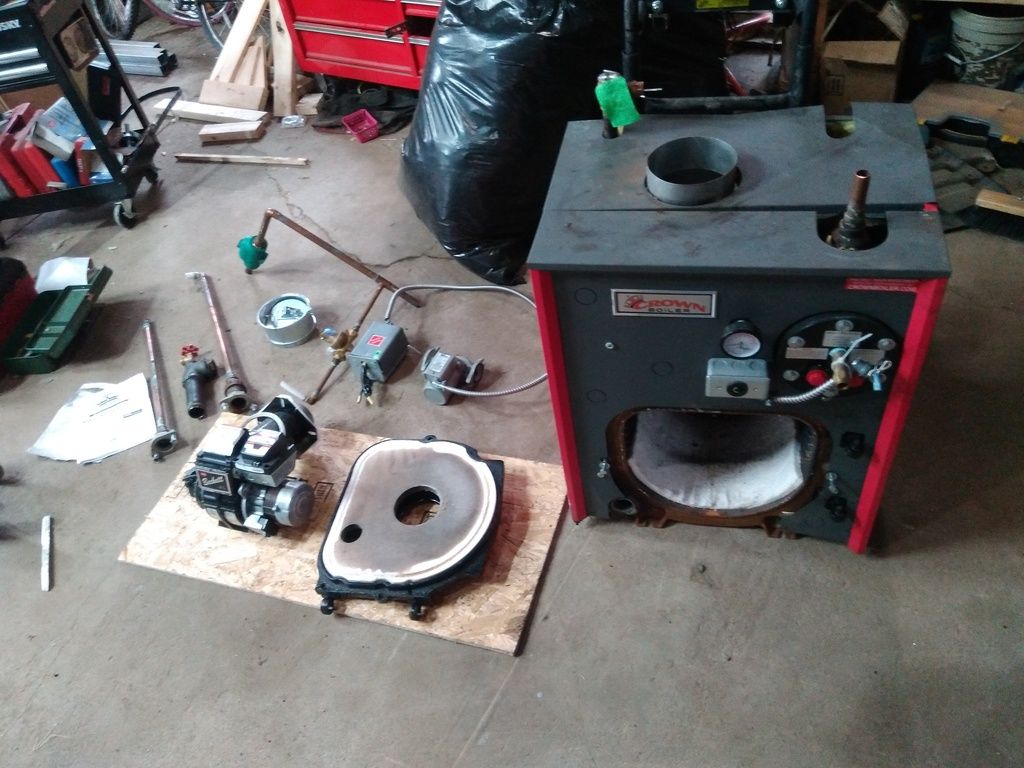
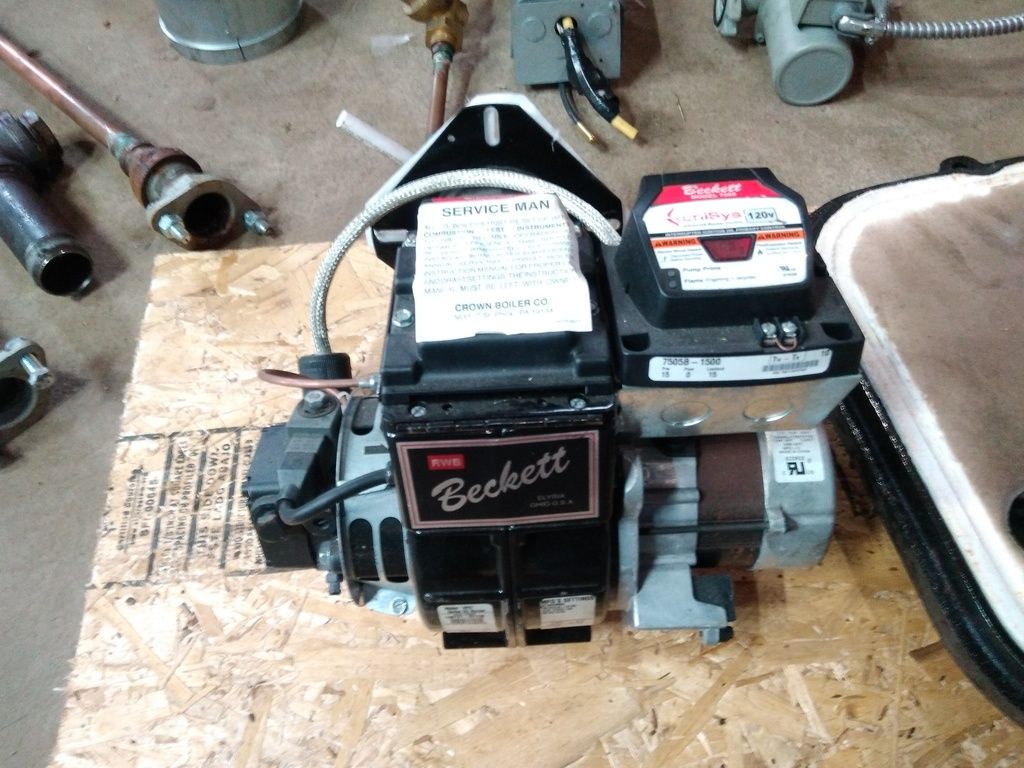
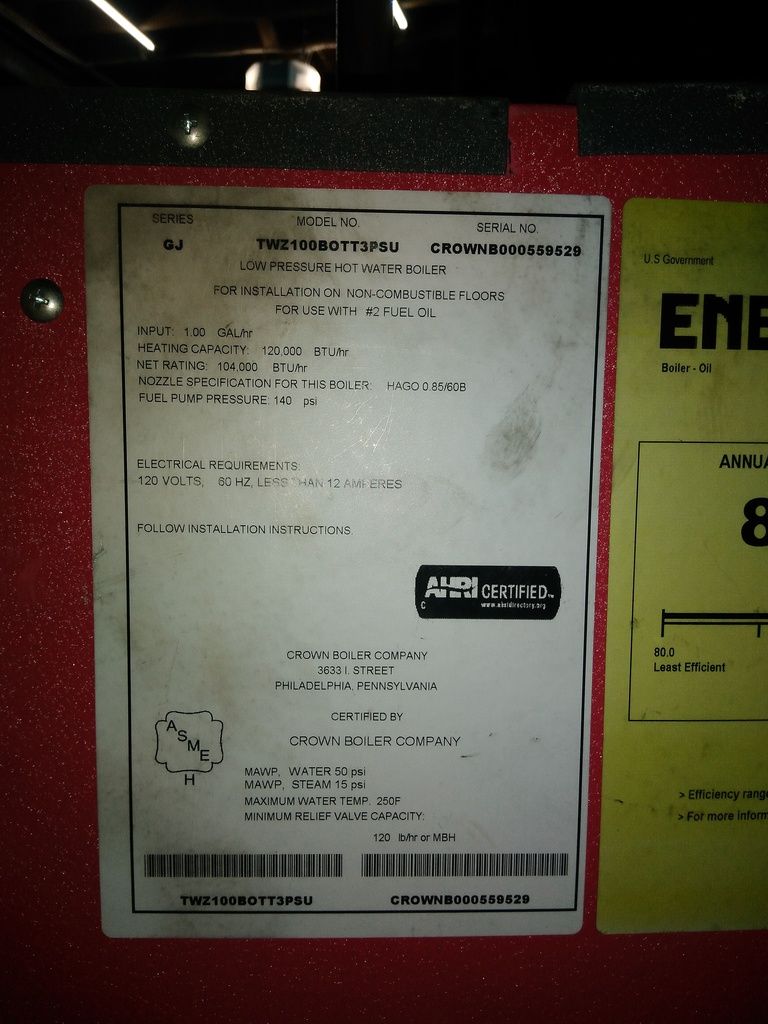
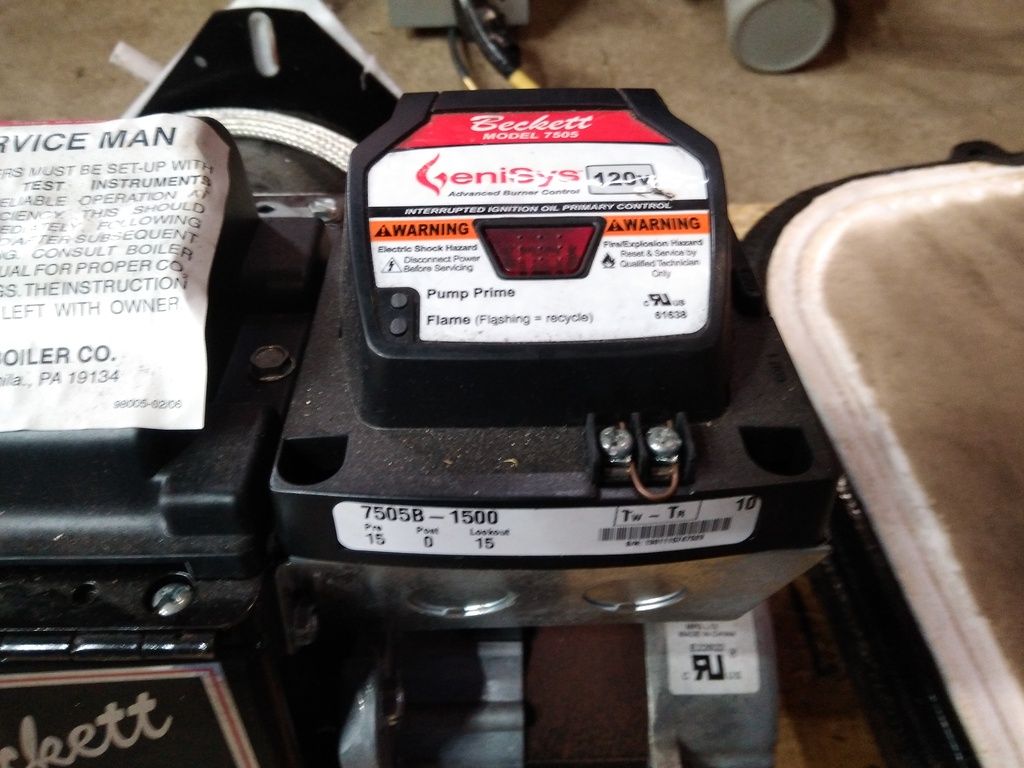
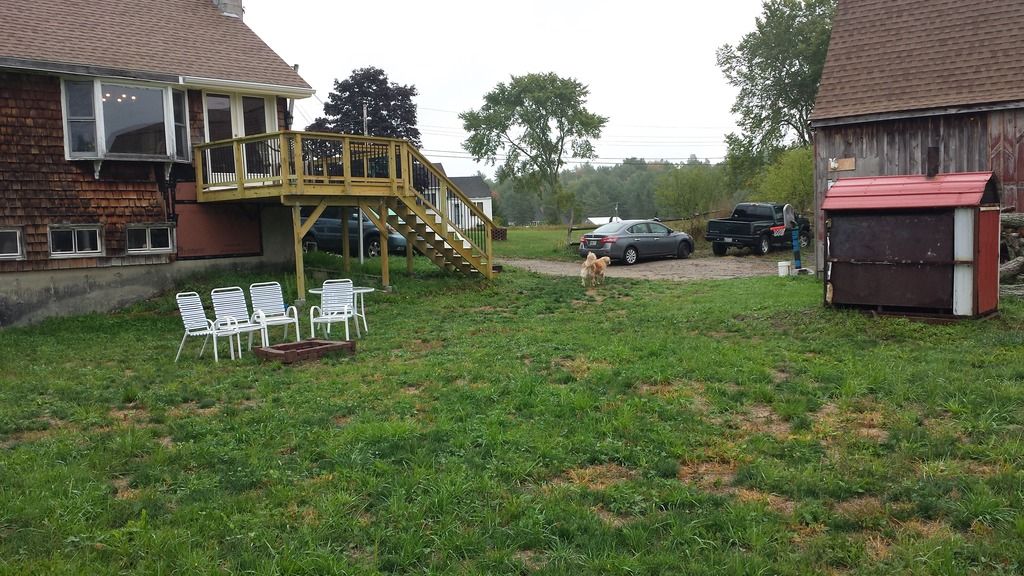
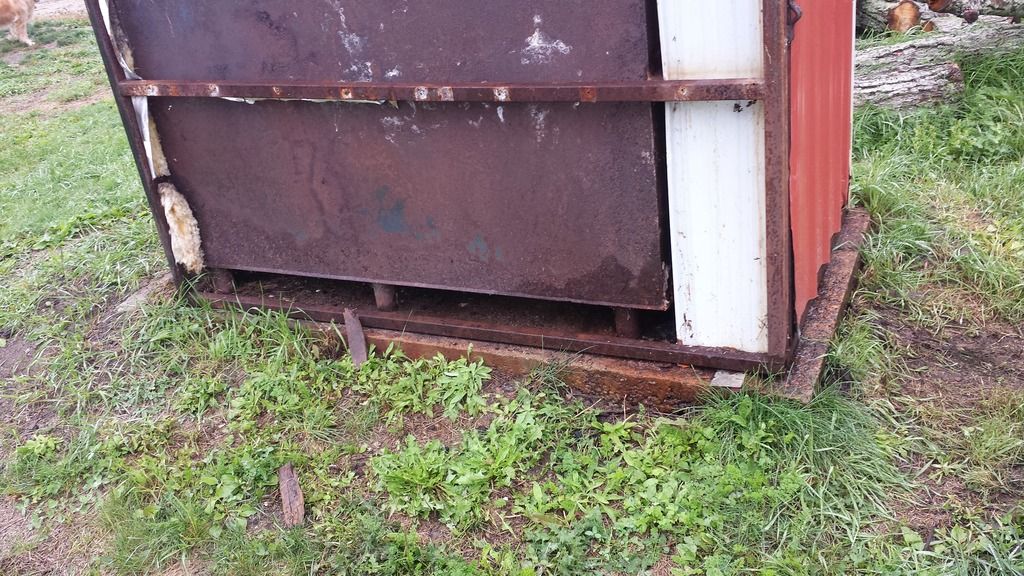
I am a huge fan of having multiple heat sources and the 40 year old memco oil boiler that I have in my basement is showing its age, so I've been watching craigslist for about 7 months looking for a deal on an oil boiler to put in for a backup system. I put a brand new 330 gal oil tank in last summer and finally found a pretty good deal on a boiler. Made the round trip to Rockland Maine this morning (~2 hrs each way) and I got all this for $400. I think I did pretty good  around $4500 retail and the only thing wrong with it is the sheet metal housing is a bit beat up. I'll pull it all off and straighten it while checking for damage behind it before I install it. Boiler itself was plumbed in, but the burner was never connected. MFG date shows July of 2013. Guy bought the house as a foreclosure and wanted to go with propane so all this was useless to him.
around $4500 retail and the only thing wrong with it is the sheet metal housing is a bit beat up. I'll pull it all off and straighten it while checking for damage behind it before I install it. Boiler itself was plumbed in, but the burner was never connected. MFG date shows July of 2013. Guy bought the house as a foreclosure and wanted to go with propane so all this was useless to him. 


3
General Outdoor Furnace Discussion / Mobile home furnace converted to barn heat
« on: December 31, 2016, 02:49:29 PM »
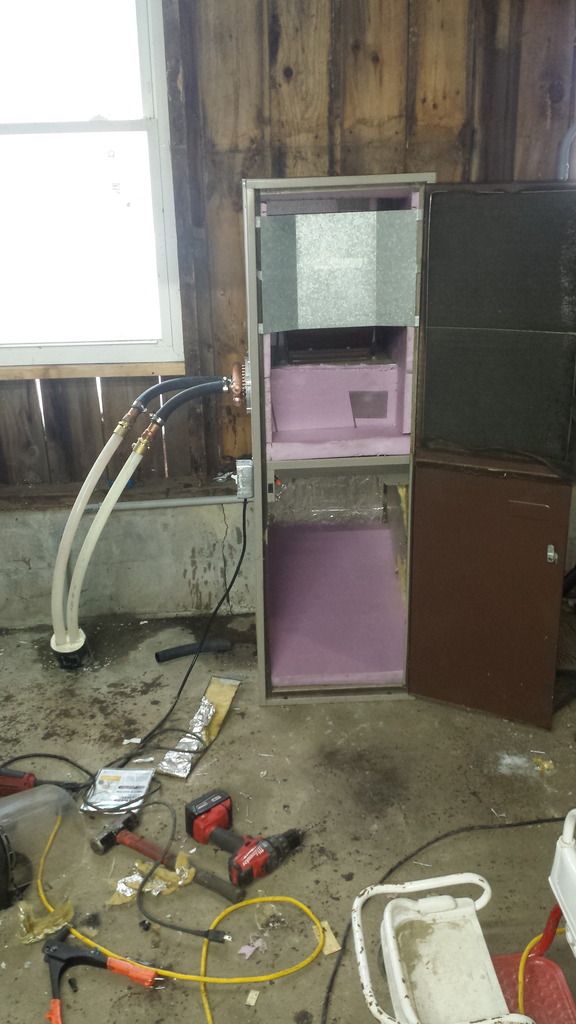
I figured id put this here instead of in my boiler install thread because this isn't exclusive to a specific brand of boiler. U picked up an old miller mobile home downdraft furnace a few weeks ago from craigslist. It was a propane fired model, so I pulled all of the propane and related parts out. What I ended up with was basically a sheet metal case with a mounted squirrel cage fan. I measured the space I had at the blower outlet and ordered an appropriate water to air heat exchanger. Knowing that my barn is not insulated I used 2" thick foam insulation to completely line the area around the blower fan except on the intake side. That way when I'm not out there working I won't be wasting any heat.
When the heat exchanger was delivered I took some measurements and found out that the thickness was the same as the i.d. of some metal studs I had laying around. I took one and bent it into a U shape for the HX to slide into and riveted it together. After making a layout on the side of the furnace and cutting an appropriate sized slot, I put the U brake into the furnace housing and riveted it in place. The HX slid in very easily yet firmly enough that it isn't going to go anywhere. Because the downdraft model is supposed to be mounted on some sort of base, I pulled the front metal where the old propane burner used to sit and riveted it at an angle skating from the back to the front. I added another piece of foam insulation to that to keep as much heat coming out the front as possible. I'm going to cut a hole in the front of the door to fit as large a register grate as I can. For the wiring side of things I simply pulled out everything from the furnace and connected the fan wires to a 110v power cord through a light switch. Flip the switch on for the fan to kick in and have heat, and flip it off for no heat. I have the circulator pump at the boiler running 24/7 to function as a mixer for the G200. I'll probably add some sort of bypass plumbing and shutoff valves along with running a thermostat of some sort once the barn is insulated, but this was fast and cheap. Besides the Logstor pipe (28') my cost was a couple feet of 1" heater hose, 4 hose clamps, a little bit of copper and fittings to adapt the Logstor to 1" copper, $50 for the furnace, $85 for the heat exchanger and some misc electrical supplies I had sitting around. About $15 more for the register cover and it'll be done. All in I have maybe 5 or 6 hours into the conversion.
The heat exchanger is rated at 96k btu's so we'll see how long it takes to get the barn comfortable next time I'm out working in it. No insulation and missing battens in a bunch of places will certainly not help, but way better than nothing. I put a thermal couple on my multi-meter and the air temp at the front of the furnace with the fan on was 111*
Just need to install the switch cover, tape up the heat exchanger to furnace seams, cut a hole in the door and put a grille of some kind on it.
When the heat exchanger was delivered I took some measurements and found out that the thickness was the same as the i.d. of some metal studs I had laying around. I took one and bent it into a U shape for the HX to slide into and riveted it together. After making a layout on the side of the furnace and cutting an appropriate sized slot, I put the U brake into the furnace housing and riveted it in place. The HX slid in very easily yet firmly enough that it isn't going to go anywhere. Because the downdraft model is supposed to be mounted on some sort of base, I pulled the front metal where the old propane burner used to sit and riveted it at an angle skating from the back to the front. I added another piece of foam insulation to that to keep as much heat coming out the front as possible. I'm going to cut a hole in the front of the door to fit as large a register grate as I can. For the wiring side of things I simply pulled out everything from the furnace and connected the fan wires to a 110v power cord through a light switch. Flip the switch on for the fan to kick in and have heat, and flip it off for no heat. I have the circulator pump at the boiler running 24/7 to function as a mixer for the G200. I'll probably add some sort of bypass plumbing and shutoff valves along with running a thermostat of some sort once the barn is insulated, but this was fast and cheap. Besides the Logstor pipe (28') my cost was a couple feet of 1" heater hose, 4 hose clamps, a little bit of copper and fittings to adapt the Logstor to 1" copper, $50 for the furnace, $85 for the heat exchanger and some misc electrical supplies I had sitting around. About $15 more for the register cover and it'll be done. All in I have maybe 5 or 6 hours into the conversion.
The heat exchanger is rated at 96k btu's so we'll see how long it takes to get the barn comfortable next time I'm out working in it. No insulation and missing battens in a bunch of places will certainly not help, but way better than nothing. I put a thermal couple on my multi-meter and the air temp at the front of the furnace with the fan on was 111*


Just need to install the switch cover, tape up the heat exchanger to furnace seams, cut a hole in the door and put a grille of some kind on it.
4
HeatMaster / New G200 replacing a rusted out Shaver
« on: November 10, 2016, 07:31:11 PM »
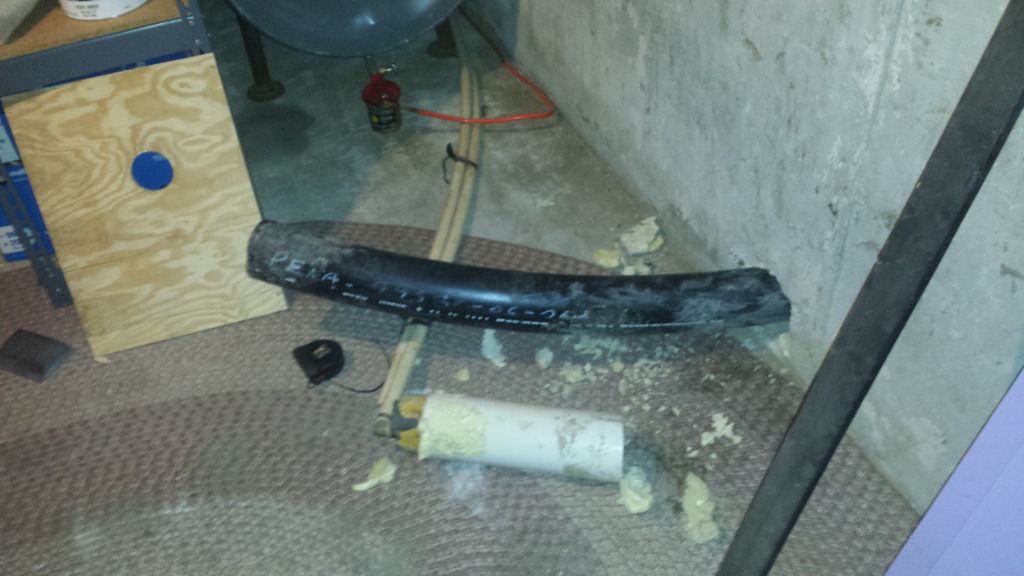
So I finally got around to starting a thread to document my G200 install. I've been working with Slimjim since I put a deposit on a G200 at the Fryeburg fair this year. So far I've gotten the old boiler removed and today he dropped off the new Logstor pipe for the runs to the house and barn. The old stuff was simply pex wrapped in black foam insulation like you can get at any hardware store then stuck through 4" PVC pipe. The pipe was never sealed so there was a lot of ground water that got into it. Last year was the 1st year I owned this house and without heating the barn I went through over 9 cords of wood. Lots of it was pine as I didn't have much time before winter when I moved into the house. Melted a good portion of the snow where the underground lines were.
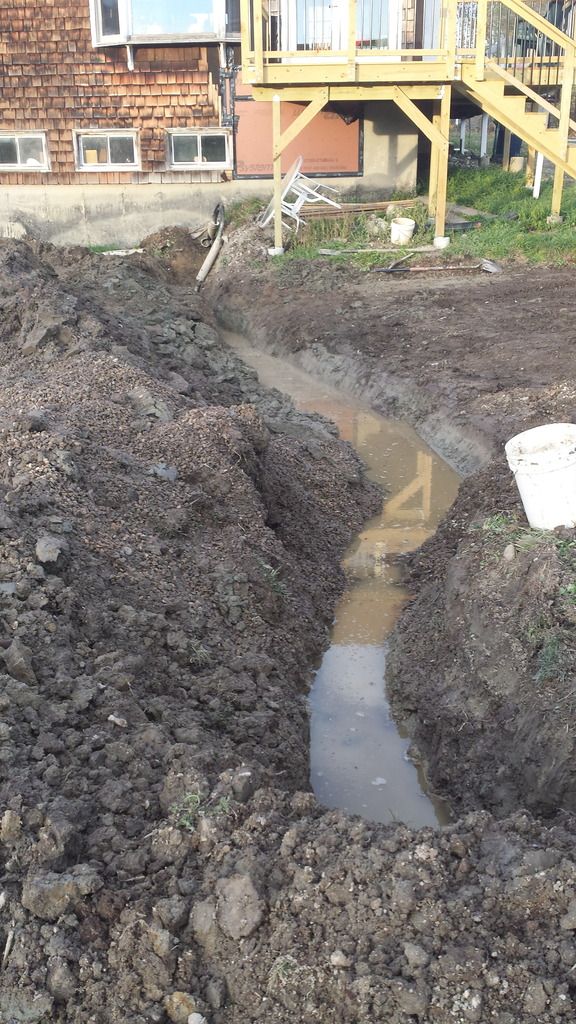
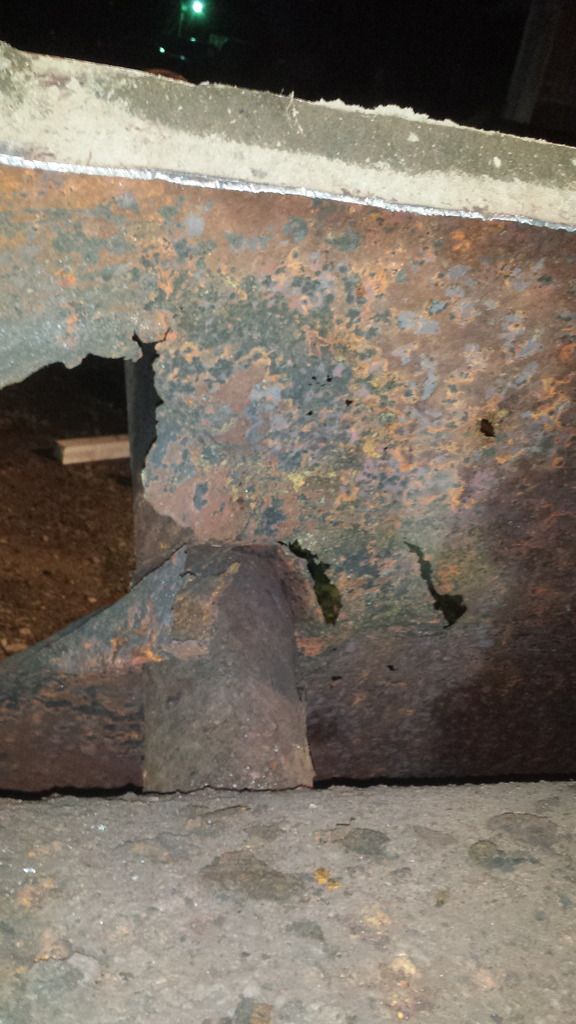
The house came with an old Shaver boiler and this summer I knew that I was going to have an issue with is as all of the water leaked out of it at some point. Unfortunately I didn't catch it until later in the summer as I work tons of hours and have side jobs that fill up pretty much all my free time. Once I started looking into it I discovered that the entire bottom of the Shaver was rusted through like Swiss cheese. I do metal fabrication work and welding, so I was very tempted to just fix it until I figured out that the entire water jacket would pretty much have to be rebuilt. All that effort and time for a very inefficient boiler really didn't make sense and so that's what started me looking at the alternatives. Selected a G200 after doing lots of research. I live about 10 min away from Slimjim, so it made the choice even easier. I removed the old boiler and dug the lines out last Saturday and today Slimjim came over with the bus and trailer to get me the Logstor pipe I needed. The old concrete pad from the Shaver had a couple of 5" diameter holes that the PVC had been fed through and I was able to get the Logstor fed through those and into the barn and basement of the house. Here are a few pictures of the old boiler and then of the trench and new Logstor pipe. My property has an extremely high water table, so when I was digging the trench I actually ran into ground water less than 2' down. I tried pumping it out and had drained it almost completely last night, but today when I was running the Logstor there was almost 2' of water in the bottom of the trenches.
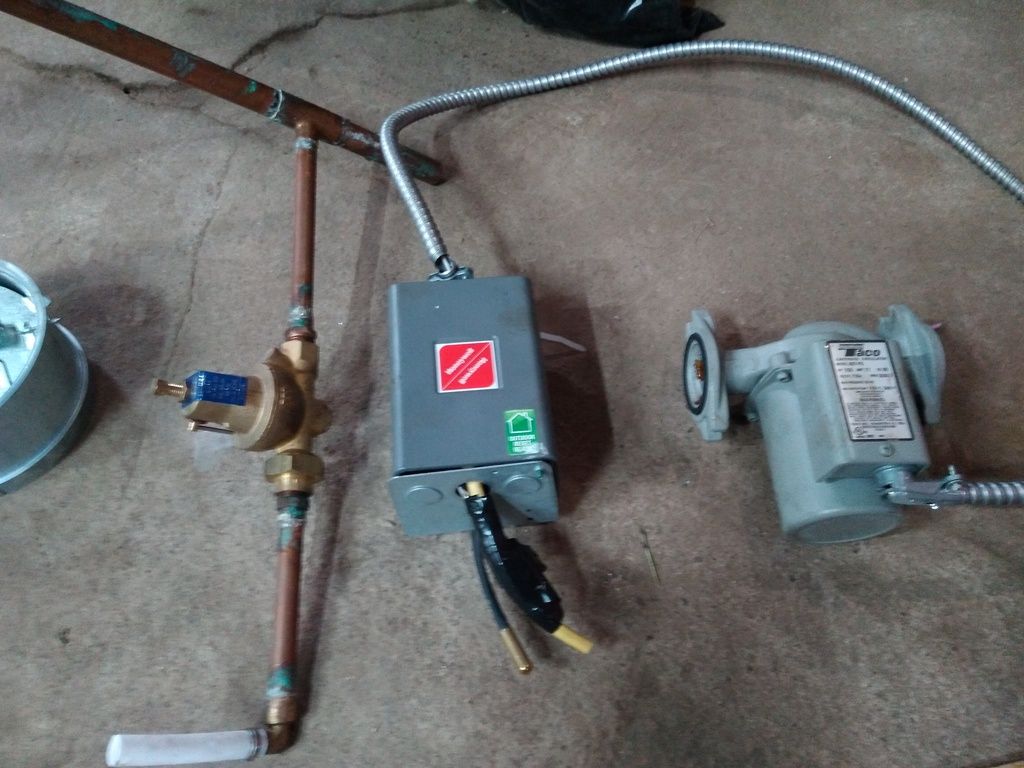
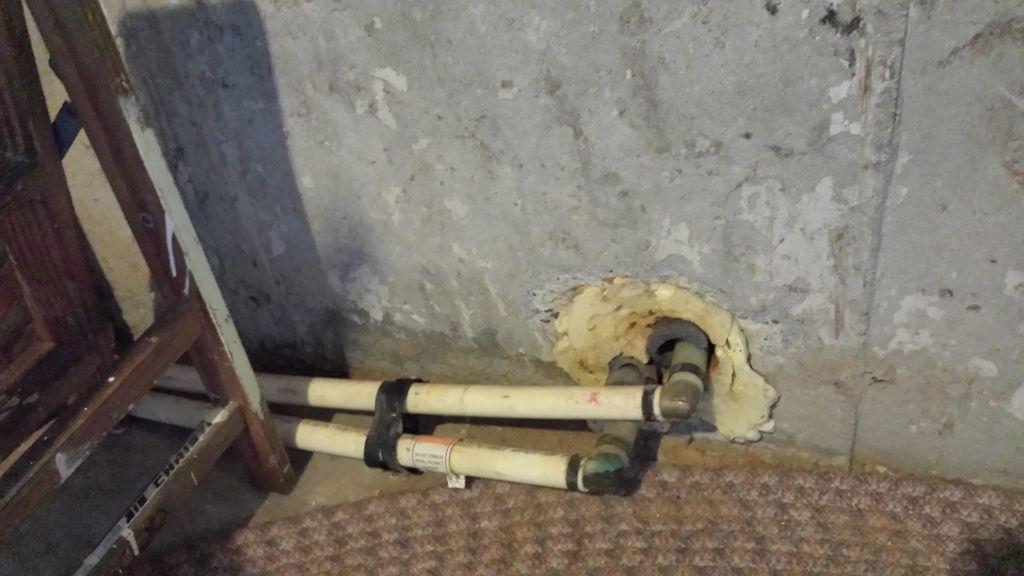
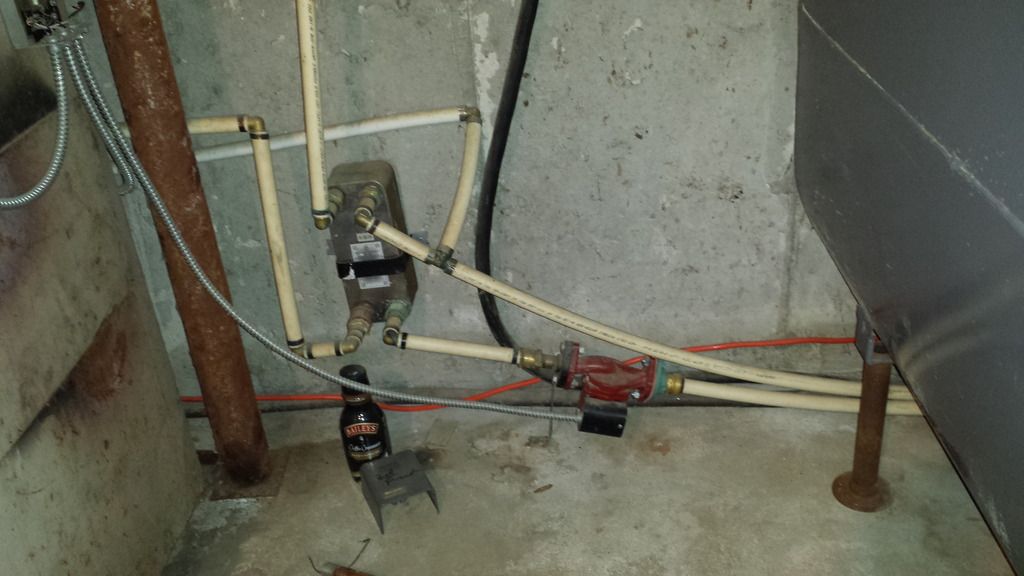
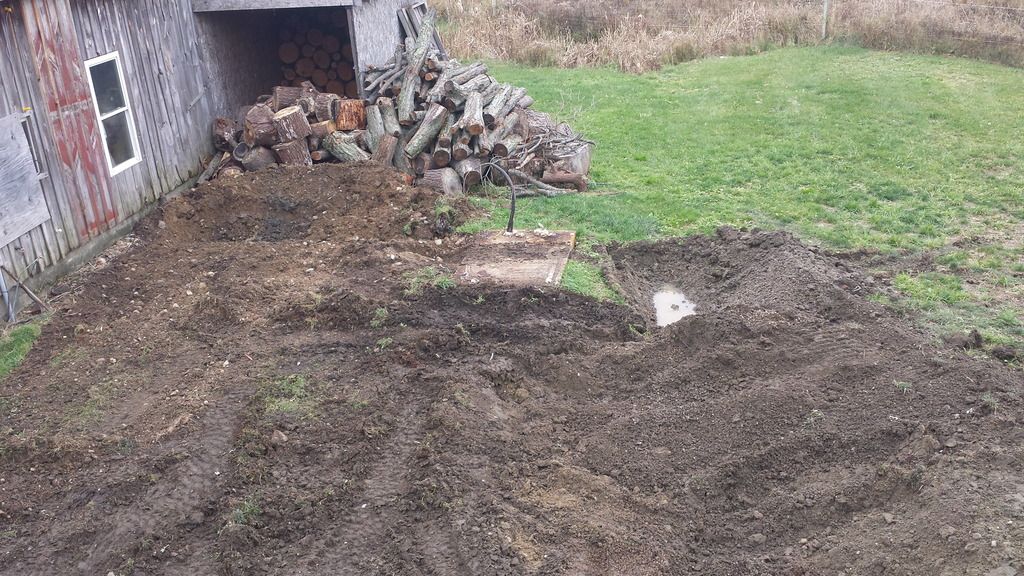
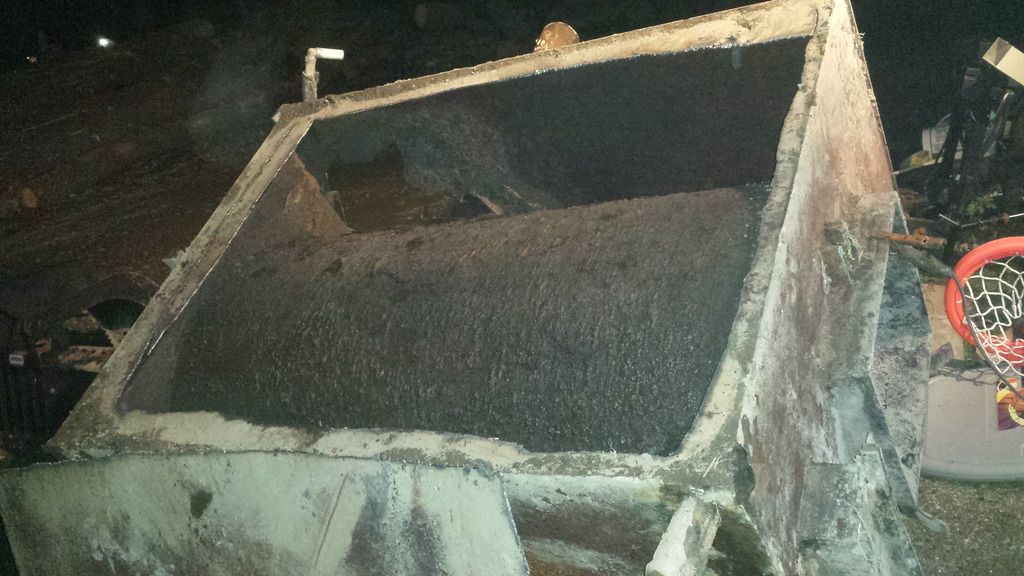
This is an overview of the old system after I had started taking it apart to inspect for leaks
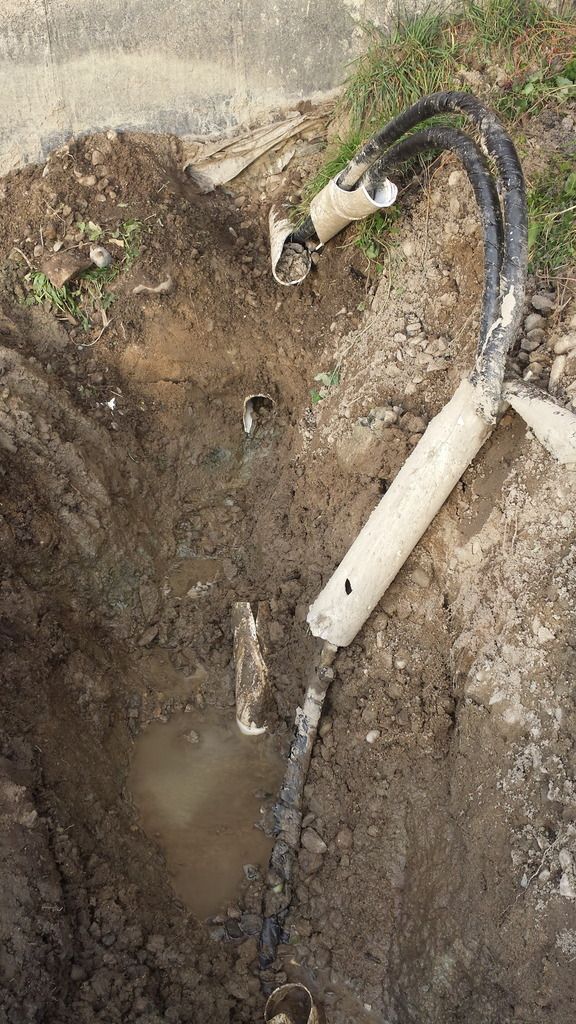
The old plumbing coming into the walk out basement and connecting to a water to water HX
Starting digging out the old pipes and trenching for the Logstor
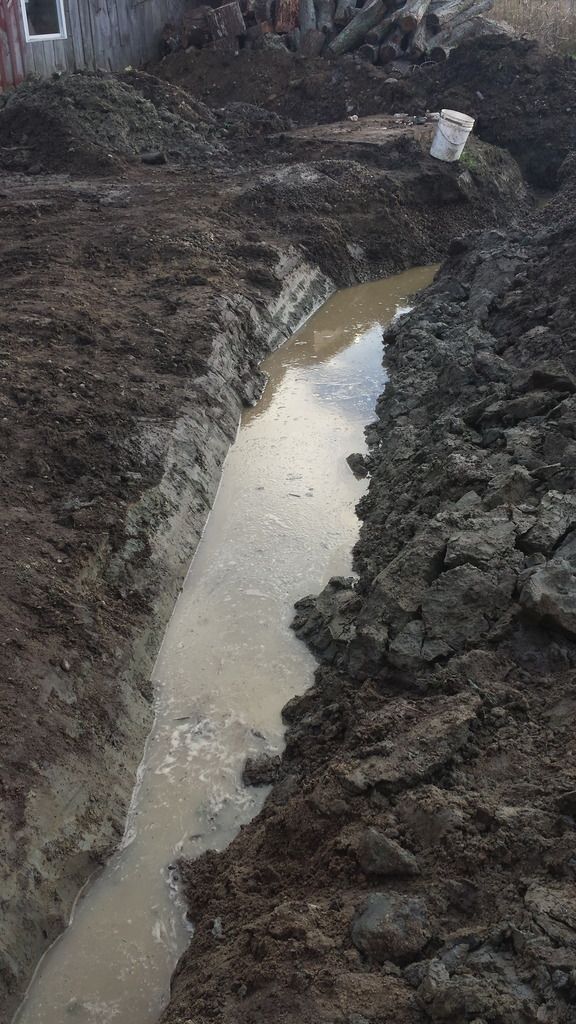
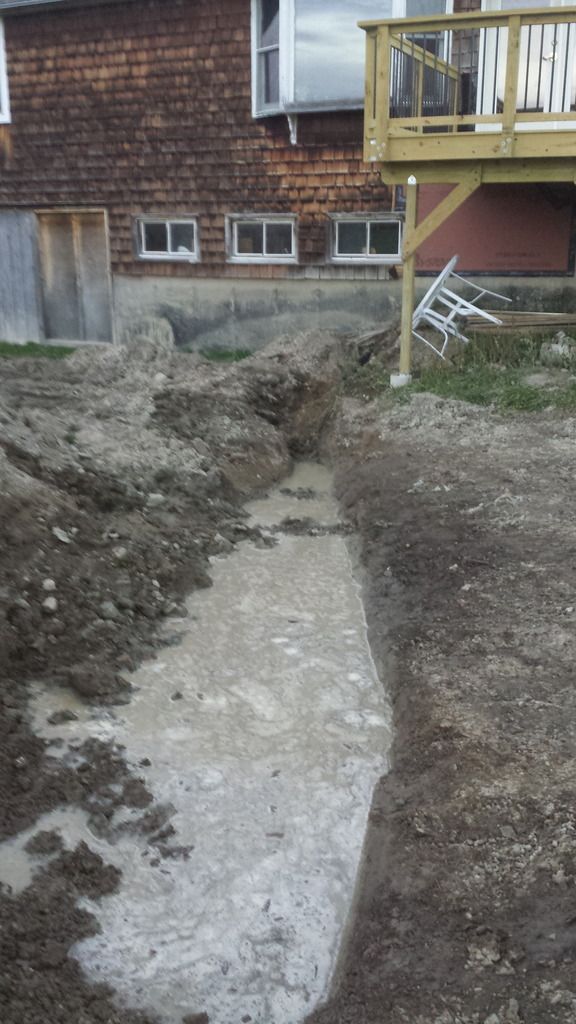
You can see how high the water is in the trench. I was watching it flow in from the sides of the trenches as I was digging it. Not much I can do about it and with the Logstor it shouldn't be an issue
Cut the old water jacket off the Shaver with my plasma cutter to see how bad the sludge buildup really was. There was about 5" of sludge in the bottom and numerous places that it had rusted through.

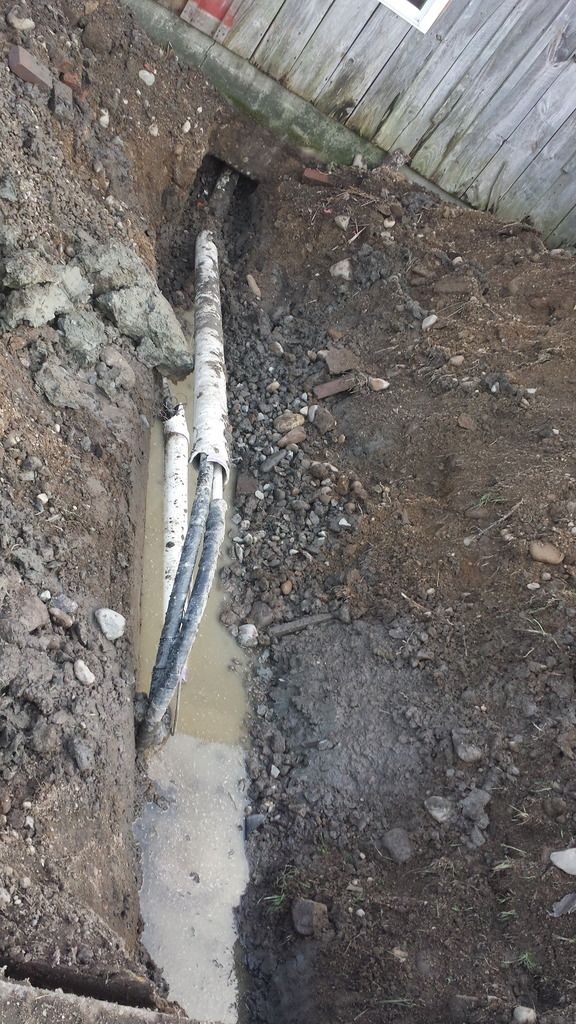
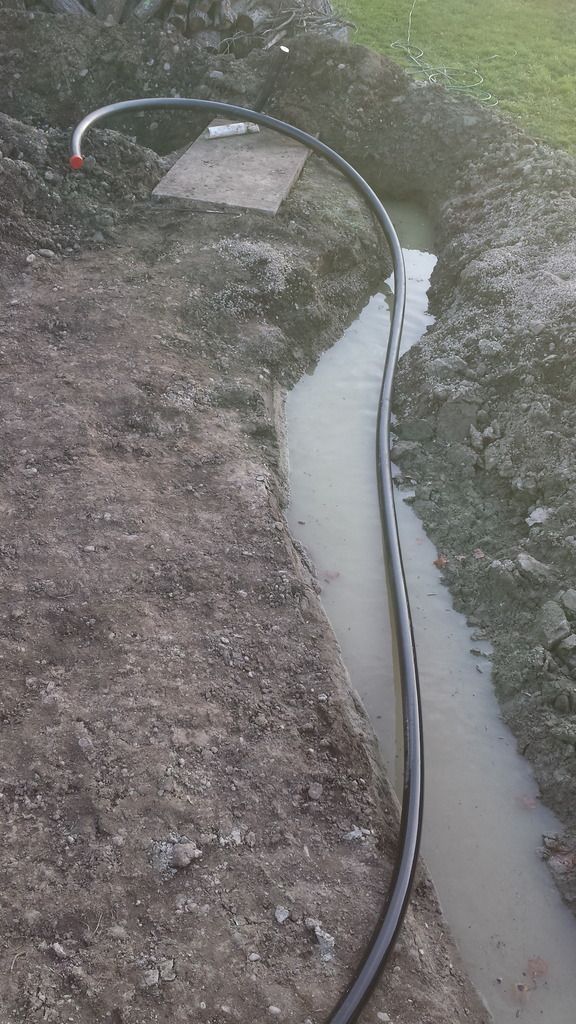
The new Logstor pipe
short run into the barn
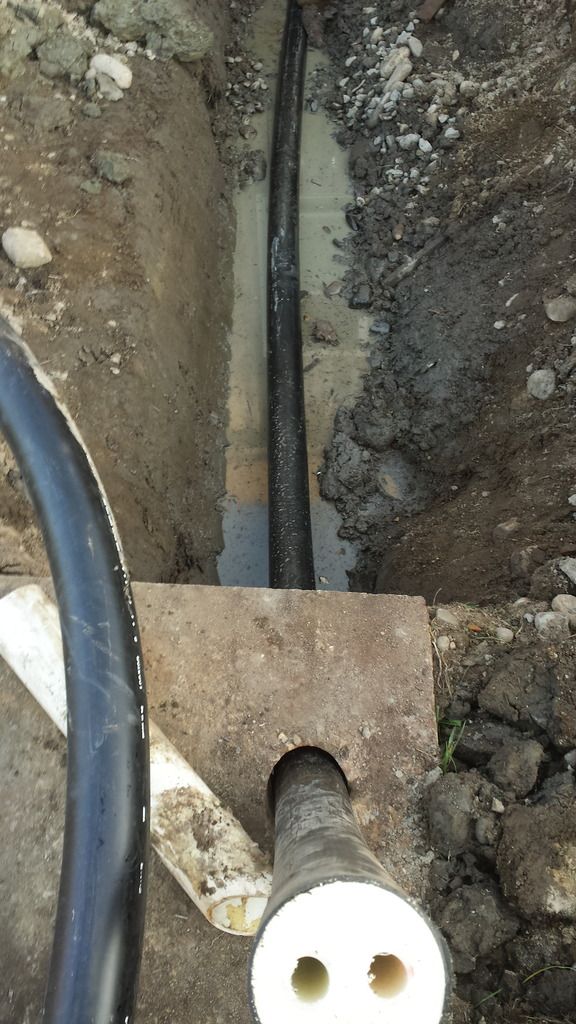
both runs fed through the existing holes in the concrete pad
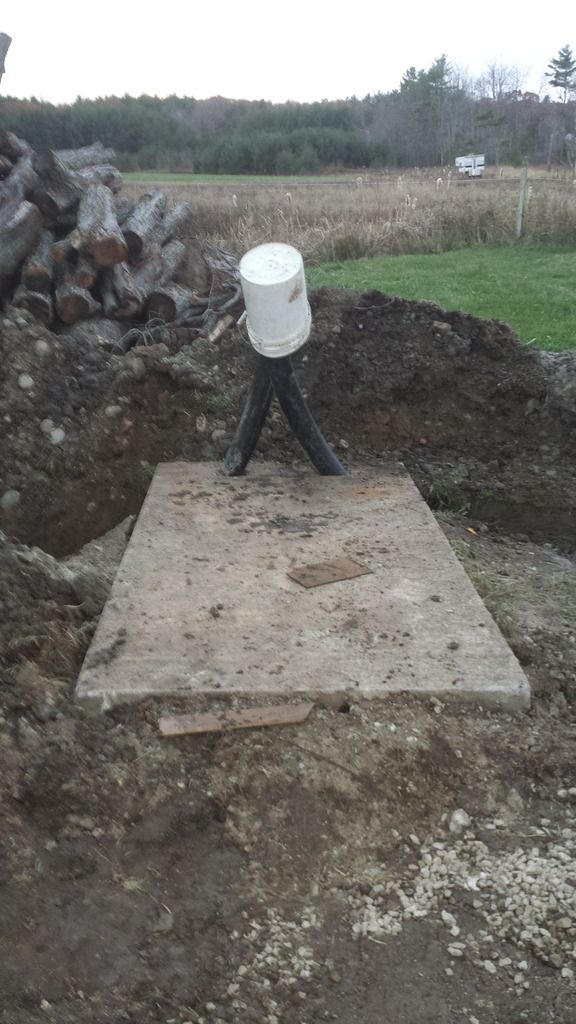
Can't really see it, but the logstor is starting to be back filled here
Barn end of the logstor. This will eventually get connected to a retrofitted mobile home furnace for heat.
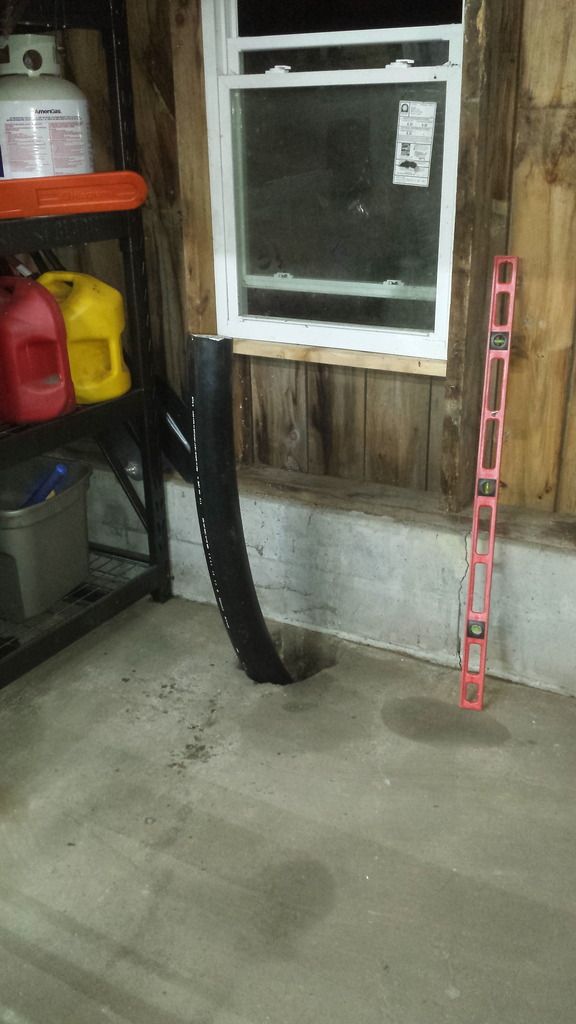
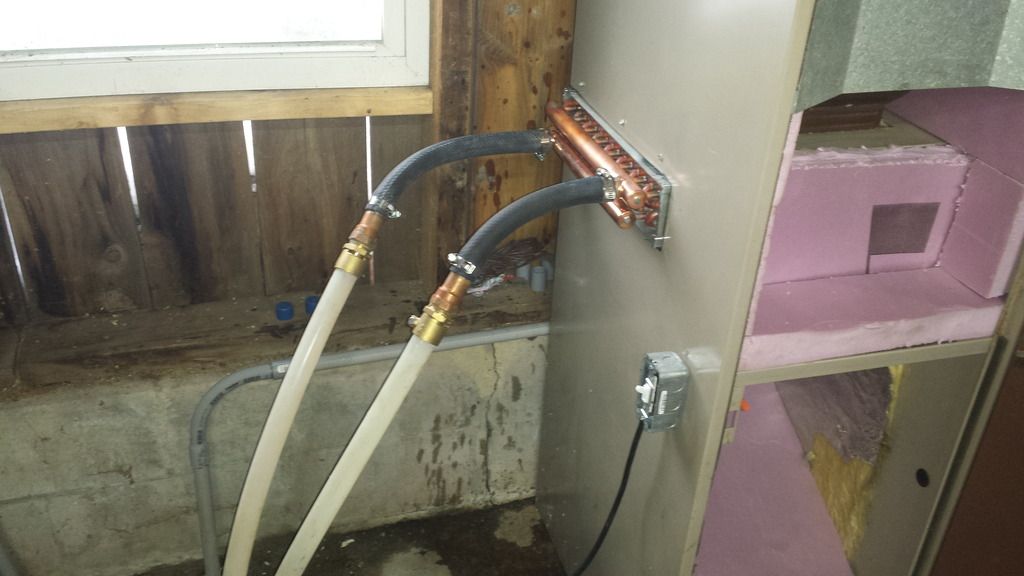
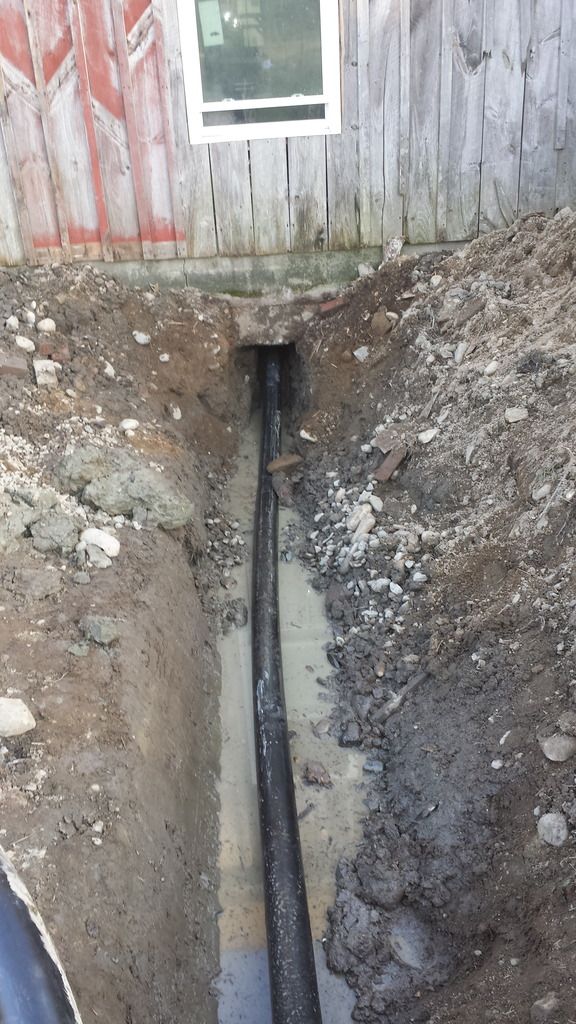
Plenty of Logstor run into the house to plumb into the hydronic system
The house came with an old Shaver boiler and this summer I knew that I was going to have an issue with is as all of the water leaked out of it at some point. Unfortunately I didn't catch it until later in the summer as I work tons of hours and have side jobs that fill up pretty much all my free time. Once I started looking into it I discovered that the entire bottom of the Shaver was rusted through like Swiss cheese. I do metal fabrication work and welding, so I was very tempted to just fix it until I figured out that the entire water jacket would pretty much have to be rebuilt. All that effort and time for a very inefficient boiler really didn't make sense and so that's what started me looking at the alternatives. Selected a G200 after doing lots of research. I live about 10 min away from Slimjim, so it made the choice even easier. I removed the old boiler and dug the lines out last Saturday and today Slimjim came over with the bus and trailer to get me the Logstor pipe I needed. The old concrete pad from the Shaver had a couple of 5" diameter holes that the PVC had been fed through and I was able to get the Logstor fed through those and into the barn and basement of the house. Here are a few pictures of the old boiler and then of the trench and new Logstor pipe. My property has an extremely high water table, so when I was digging the trench I actually ran into ground water less than 2' down. I tried pumping it out and had drained it almost completely last night, but today when I was running the Logstor there was almost 2' of water in the bottom of the trenches.
This is an overview of the old system after I had started taking it apart to inspect for leaks


The old plumbing coming into the walk out basement and connecting to a water to water HX


Starting digging out the old pipes and trenching for the Logstor


You can see how high the water is in the trench. I was watching it flow in from the sides of the trenches as I was digging it. Not much I can do about it and with the Logstor it shouldn't be an issue


Cut the old water jacket off the Shaver with my plasma cutter to see how bad the sludge buildup really was. There was about 5" of sludge in the bottom and numerous places that it had rusted through.


The new Logstor pipe


short run into the barn

both runs fed through the existing holes in the concrete pad

Can't really see it, but the logstor is starting to be back filled here

Barn end of the logstor. This will eventually get connected to a retrofitted mobile home furnace for heat.

Plenty of Logstor run into the house to plumb into the hydronic system

Pages: [1]